A new version of the deep learning library fastai is coming out soon. I quickly try out some of its new APIs in a Kaggle competition.
You can find my Jupyter notebooks for the competition here.
Fastai v2 walkthrus
Recently Fastai's Jeremy Howard posted a series of video walk-thrus in which he introduced fastai v2, a new version of the deep learning framework that the Fastai team has been working on. I find these really interesting because there appear to be quite neat APIs for loading, processing and displaying data, it uses some Python language features that I have heard of but do not normally use, the syntax doesn't quite read nor behave like normal Python code, and the whole library (code, tests, documentation) is developed inside Jupyter notebooks.
Obviously, I don't know all the features nor properly understand how the ones I know work under the hood yet, but here I test out some of the 'mid-level' APIs in a Kaggle competition to get a feel of the workflow.
Understanding Clouds from Satellite Images
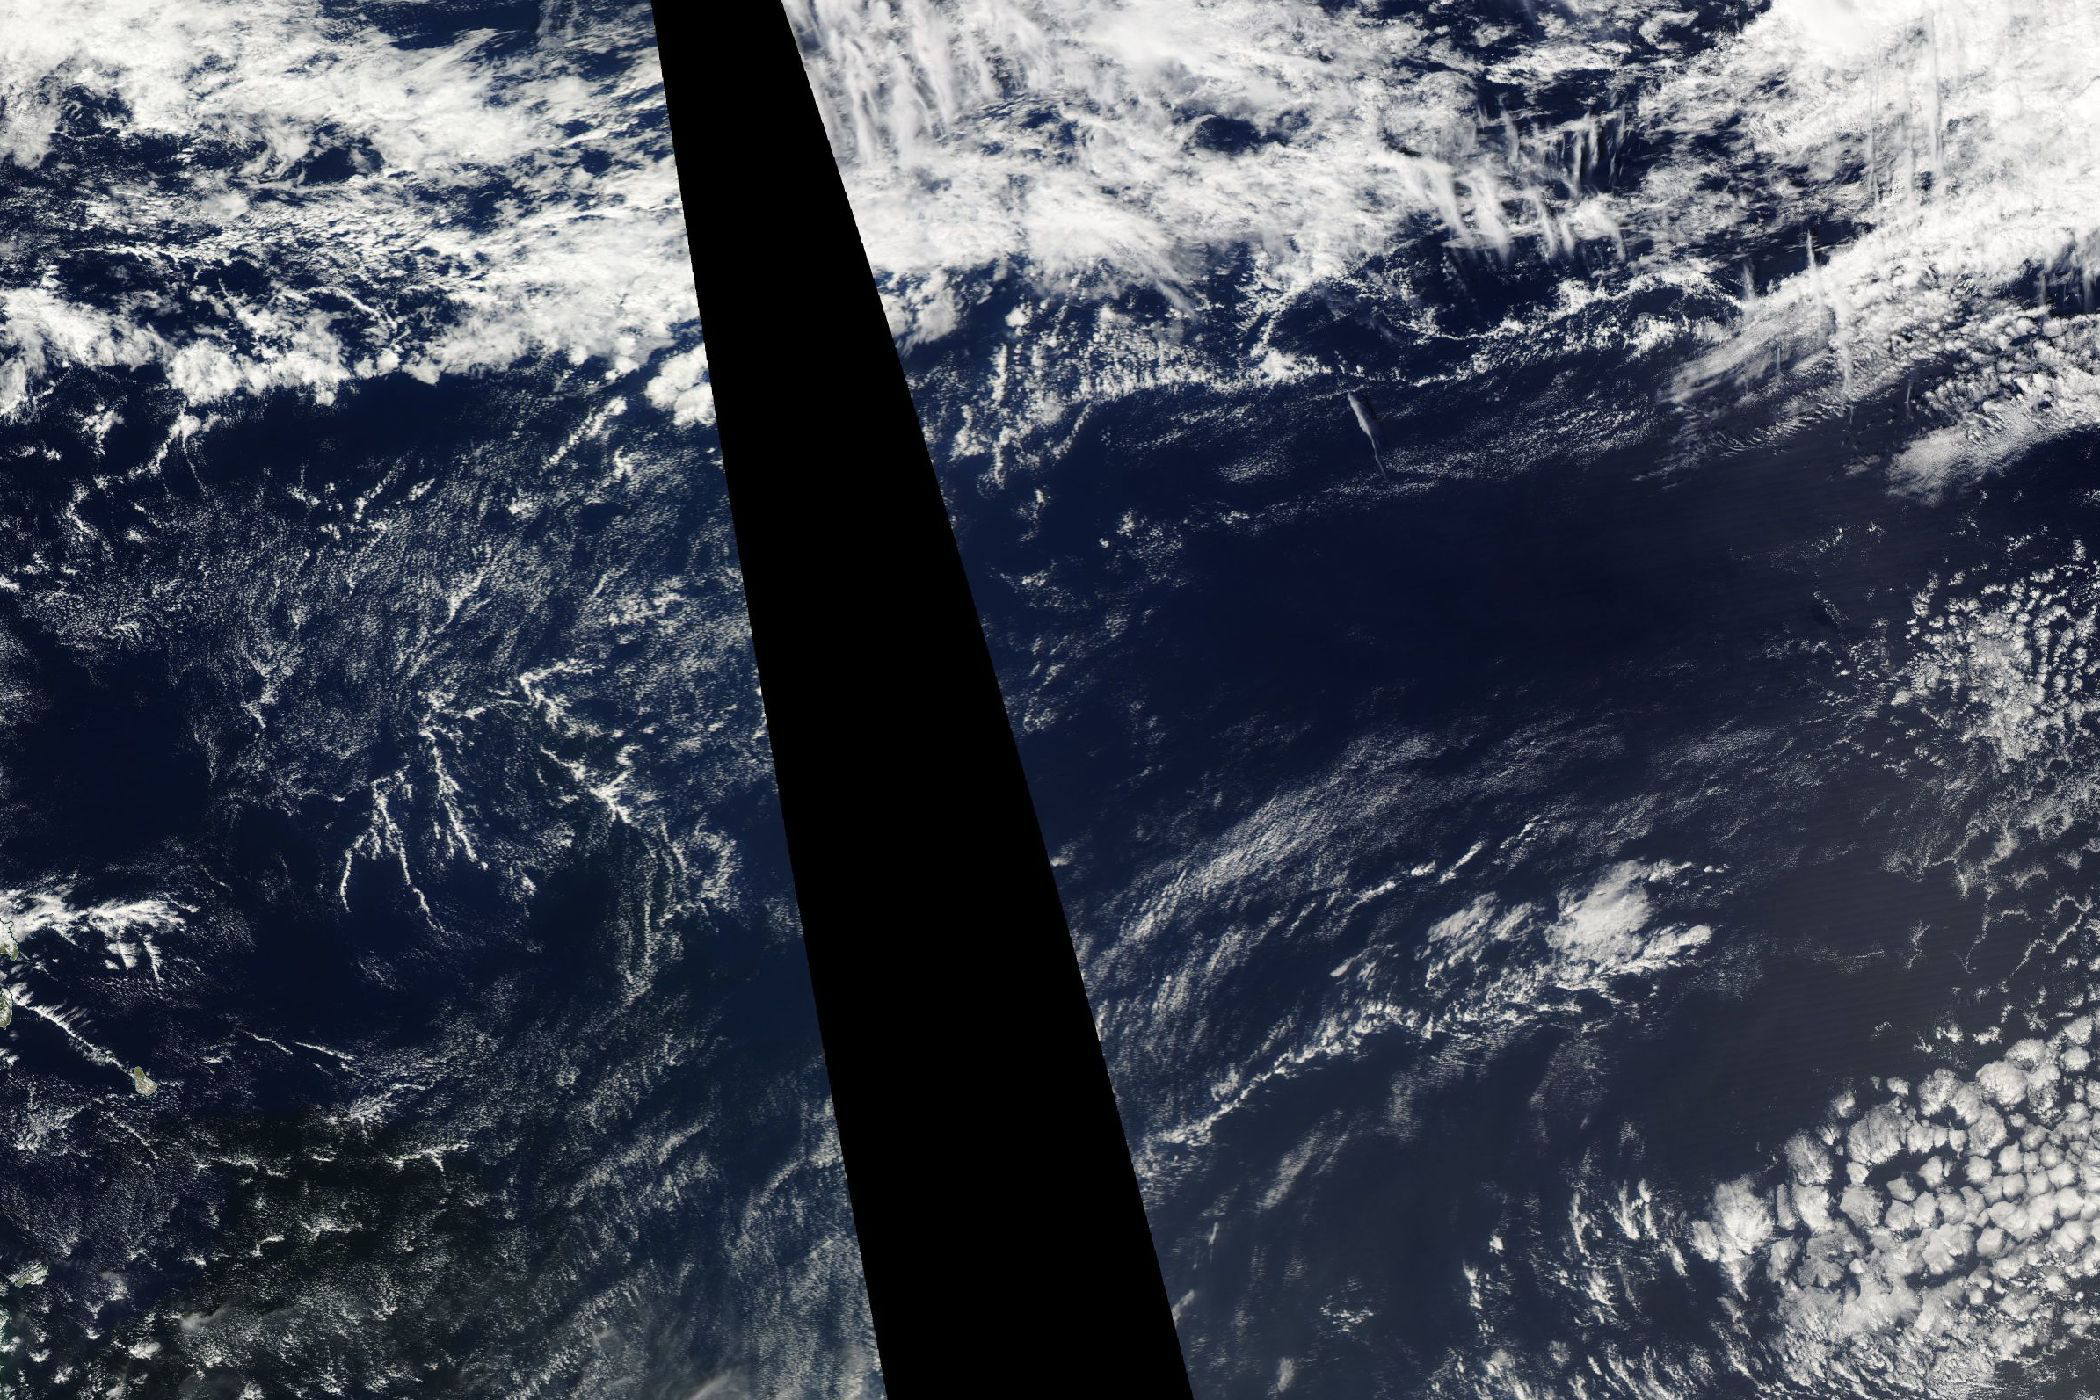
The competition used here is the Understanding Clouds competition. The dataset consists of satellite images of clouds, and four types of clouds are considered: fish, flower, gravel, and sugar. In an image, each of these cloud types can be either present or not present. For those types that are present, the goal is to mark out where they are present in the image.

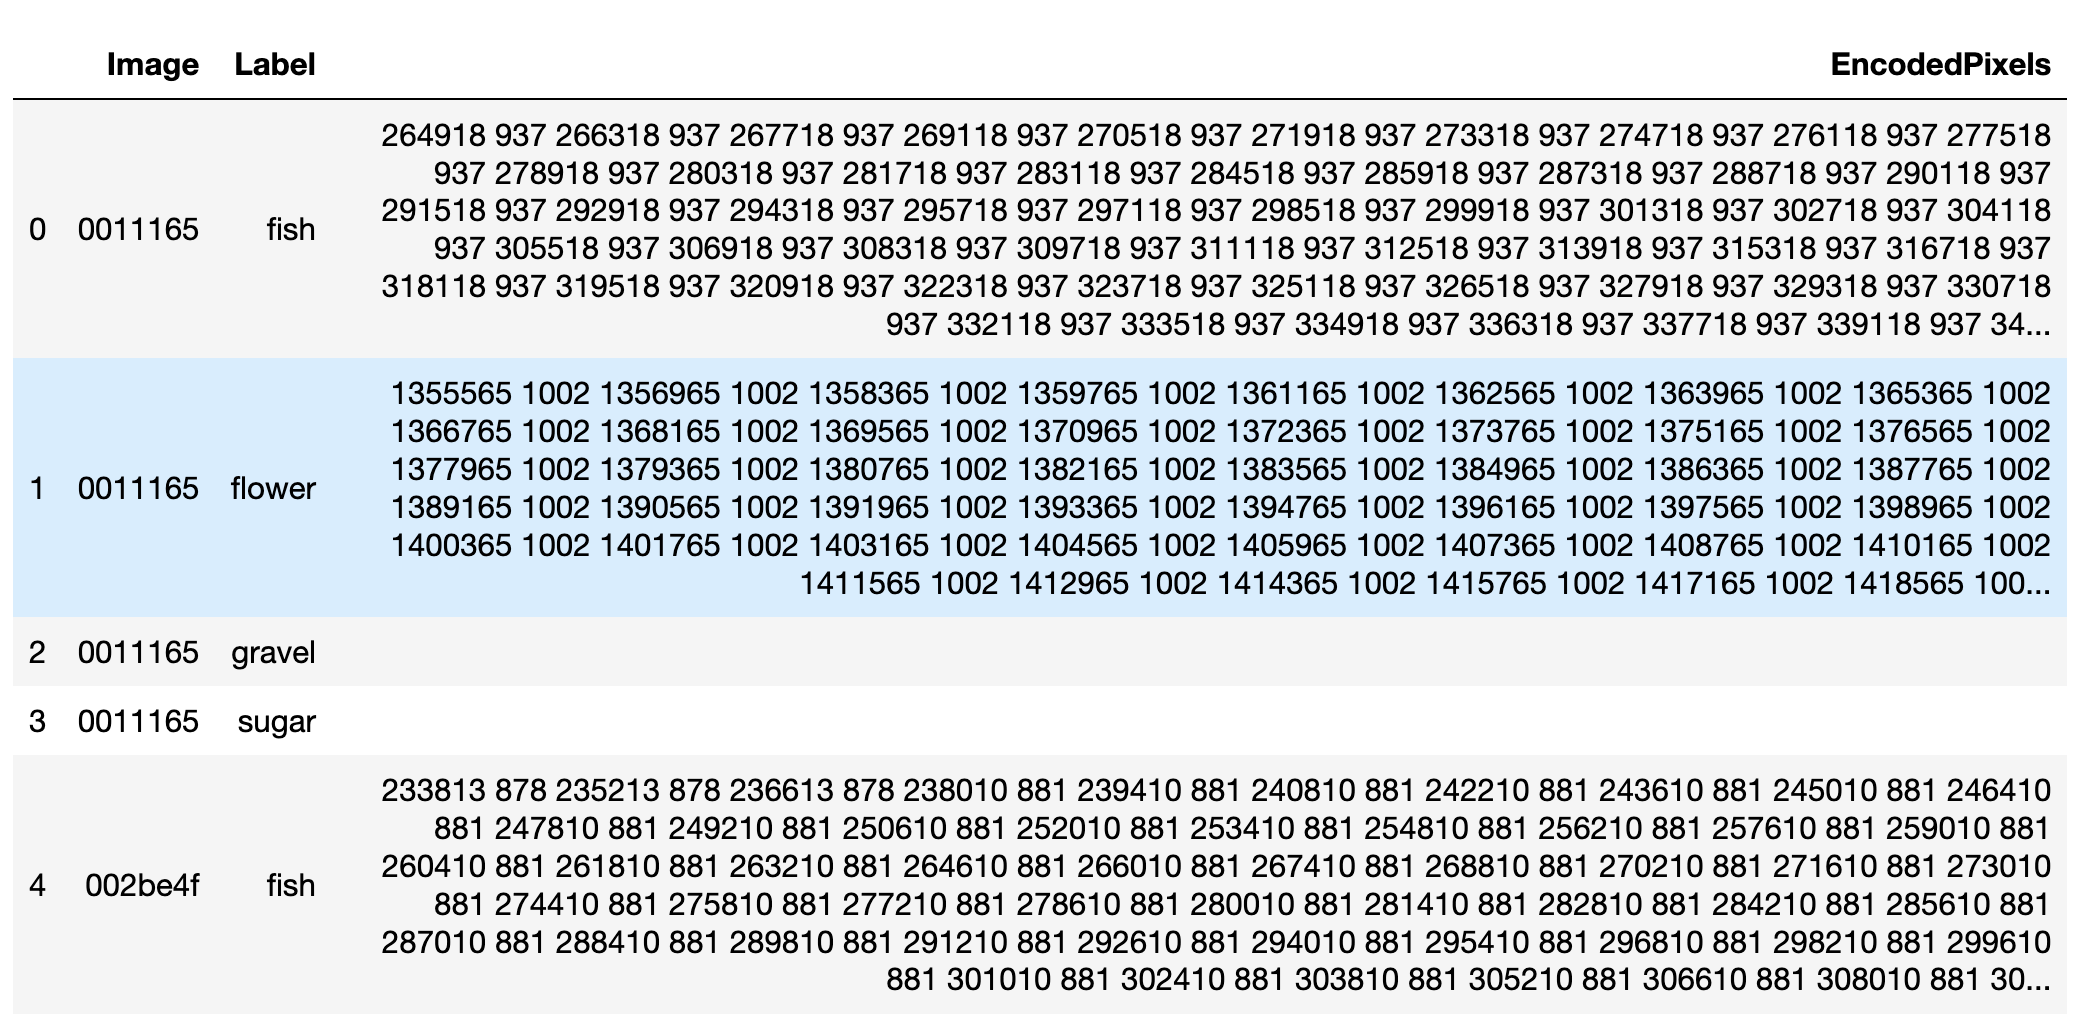
The table in in FIGURE 2 shows a small part of the dataset's annotation. For each row here, there is an image id (Image), a cloud type (Label), and a run-length encoding (EncodedPixels), which describes where clouds of the cloud type are located in the image. There is no run-length encoding when no clouds of the cloud type are present in the image. So, for example, there are no sugar or gravel clouds in the image 0011165.

Data Transform
In fastai v2, there is a type, Transform, that describes a data transform. In general, a transform has an encode and a decode method. The encode method changes the data from one form into another that is closer to being accepted by the model, i.e. tensors. The decode method changes the data into a form that is further away from a form accepted by the model.
For example, here, the data we have to start with is the dataframe, part of which is shown in the table in FIGURE 2. For the image, the starting form is a string containing the image id. One tiny step towards the model might be to encode this image id into the image file path. It is possible to define a transform to do this:
class ImgFilename(Transform):
    "Dataframe row --> file path to image"
    def __init__(self, path:Path): self.path = path
    def encodes(self, o): return Path(self.path)/f'{o.Image}.jpg'
Note that this transform is initialised with the directory path where the image files are stored, and the encodes method adds the .jpg file extension to the image id, before the directory path is prepended. A decodes that reverses this could be:
def decodes(self, o): return o.stemEven though 'decodes' sounds like it should do the exact opposite of what the encodes method does, it is not necessary, just that it should take the data towards a form that is closer to the original. Since encodes is used very often, you can call it by simply calling the transform object:
>> imgfn = ImgFilename('train/')
>> imgfn(o)
PosixPath('train/0011165.jpg')
Pipelines
It is possible to chain together one or more transforms together. This is done using Pipeline. A pipeline also has an encode and a decode method. Calling its encode method is equivalent to calling all its transforms' encode methods one after another, starting from the first transform. For example, in fastai v2, PILImage.create is a transform that encodes a file path to a PILImage object.1 We can chain this with the transform above to get:
Pipeline([ImgFilename('train/'), PILImage.create])This is a transform that encodes an image id into a PILImage object.
Calling a pipeline's decode method is equivalent to calling all its transforms' decode methods one after another, starting from the last transform, except this time, it will stop as soon as one of the decode methods returns something that has a show method. Normally when we decode something, we mean we want to see what it looks like, and in fastai v2, something that has a show method defined is something that shows itself. But this does not mean we always find looking at data in its original form the most informative. For example, for a pipeline that encodes an image id into a PIL image, then into a tensor, we only want to decode the tensor up to the PIL image, because the PIL image can be easily displayed to convey the information contained in the image (PIL images render themselves in Jupyter for example); there is no point in looking at an image id. So, by placing the show method carefully, we can choose the form in which the data is displayed.
#Suppose all the image files are stored in a directory at path, then from the image id, the path to the image file is:
##+BEGIN_SRC python
#Path(path)/f'{o.Image}.jpg'
##+END_SRC
#where o is a row in the annotation table. In fastai v2, this statement can be put inside the encodes method of a Transform:
##+BEGIN_SRC python
#class ImgFilename(Transform):
##+END_SRC
#Calling a Transform object is equivalent to calling its encodes method:
##+BEGIN_SRC python
#>> imgfn = ImgFilename('train/')
#>> imgfn(o)
#PosixPath('train/0011165.jpg')
##+END_SRC
#This is a very simple example of a Transform in fastai v2.
#
#To go from the filepath to a PILImage object, there already exists a Transform to do this in fastai v2, namely PILImage.create, which takes a file path and encodes it into a PILImage.
#
#Multiple transforms can be chained together using Pipeline:
##+BEGIN_SRC python
#Pipeline([ImgFilename('train/'), PILImage.create])
##+END_SRC
#is a Transform that encodes an image id into a PILImage.
#
#Similar to image id, a transform can also be constructed to encode EncodedPixels to a PILMask:
##+BEGIN_SRC python
#class MaskTfm(Transform):
##+END_SRC
#
#For Label:
##+BEGIN_SRC python
#def labeller(o): return o.Label
##+END_SRC
#Since Label is already what we are after, a string, it's not been put into a Transform, but you can do it if you want to.
#
#Finally, it is possible to group the transforms together, into another transform:
##+BEGIN_SRC python
#class CloudTfm(Transform):
##+END_SRC
#At this point we have successfully encoded a row in the annotation table into a tuple (PILImage, str, PILMask).
#
#Notice that the word encode is used here to mean changing the data into something closer to being accepted by the model. In practice, since you can write anything inside the encodes method, it is up to you how finely you want to divide your data processing pipeline into different transforms.
#
#*** Decoding data
#For every transform, you can define a decodes method that does the opposite of the encodes method. It does not necessarily need to reverse the encodes method, as in returning the input of it, more like moving the data away from a form accepted by the model. For example, an image in the form of a torch.Tensor can be directly used by a model, but it cannot be input into plt.imshow for visualization, so you need to decode it into a np.array first before being able to visualize it.
#
#Just as the encodes methods of its transforms are called one after another inside a Pipeline, the decodes methods are also called one after another, except in the reverse order, and until an object with a show method is encountered. In our example, we can create a type, CloudImageLabelMask, whose show method plots the image, the mask over it, and then add the label in the title, and ask CloudTfm.decodes to return this type:
##+BEGIN_SRC python
#class CloudImageLabelMask(Tuple):
# #class CloudTfm(Transform):
##+END_SRC
#Now we can decode and display the data from our row:
##+ATTR_HTML: :width 600
##+CAPTION: FIGURE 3. In cell 15, the row is encoded, and in cell 16, it's decoded into something with a show method.
# #
#This is neat because we do not need to look for and grab a plotting function that can plot our encoded data: (
#
#This is neat because we do not need to look for and grab a plotting function that can plot our encoded data: (PILImage, str, PILMask), we just need to call decodes and the result of that will know how to show itself.
Something that shows an image and its masks
In this dataset, each image has four masks that correspond to it. So, I try to think of a single sample here as consisting of one image as the input, and the four masks together as the target.
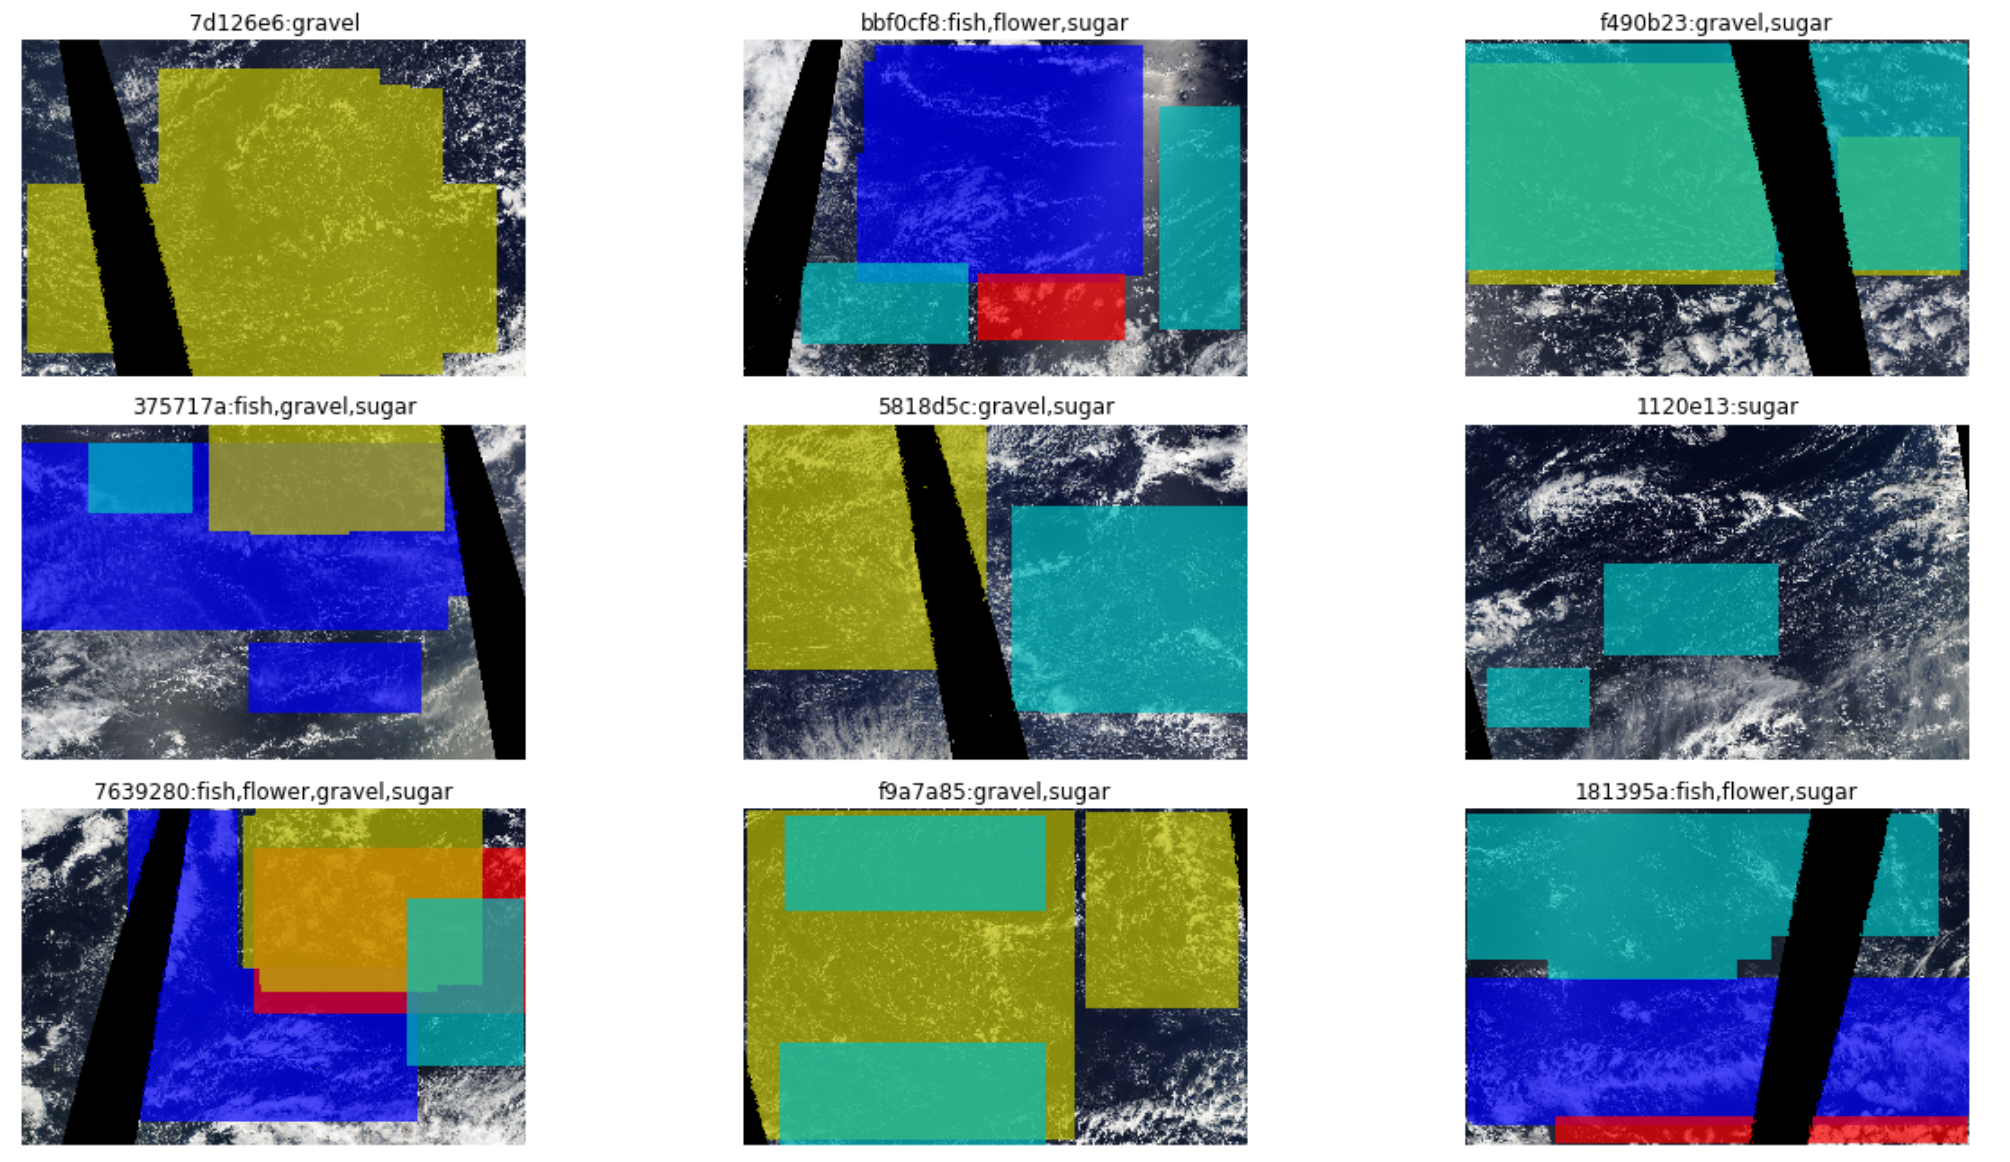
An obvious way to visualize such a sample is to plot the image and overlay the masks over it, so I first create a type with a show method that does just this:
class CloudTypesImage(Tuple):
    def show(self, ax=None, figsize=None):
        imgid, img, masks = self
        if ax is None: _, ax = plt.subplots(figsize=figsize)
        ax.imshow(img)
        for cloud, m, in masks.items():
            if m.sum() == 0: continue
            m = np.ma.masked_where(m < 1, m)
            ax.imshow(m, alpha=.7,
                      cmap=colors.ListedColormap([COLORS[cloud]]))
        present_clouds = [cloud for cloud, m in masks.items() if m.sum() > 0]
        ax.set_title(f"{imgid}:{','.join(present_clouds)}")
        ax.axis('off')
It assumes that each sample is a tuple of image id, image, and finally a dictionary that maps cloud type to its mask over the image. Each mask gets a different colour, to separate them out, and the title of the plot will list all those cloud types that are present in the image.
Then, a transform is defined to encode an image filename to the tuple described above and to decode to a CloudTypesImage object:
class CloudTypesTfm(Transform):
    def __init__(self, items, annots):
        self.items, annots = items, annots

    def encodes(self, i):
        fn = self.items[i]
        img = PILImage.create(fn)

        imgid = fn.stem
        df = annots[annots.Image==imgid]
        df.EncodedPixels.fillna(value='', inplace=True)
        df.loc[:,'Mask'] = df.EncodedPixels.apply(partial(rle_decode, shape=img.shape))
        masks = {o:df[df.Label==o].Mask.values[0] for o in df.Label}
        return imgid, img, masks

    def decodes(self, o): return CloudTypesImage(*o)
A list of image file names and the annotation table (as described above) are used to create such a transform. It loads the image from the file name. The corresponding rows are looked up in the annotation table to get the run-length encoded masks. These are converted to arrays and organised into a dictionary. The image id, the image and this dictionary are then grouped into a tuple.
The decodes method takes this tuple, creates a CloudTypesImage object, and returns that. So now, effectively, we have a transform that converts the original data to images and masks, and when decoded, will display the image with all its masks, indicating the cloud types present. However, it's not clear to me how to go from here to a databunch that is usually expected by a Fastai Learner, and in a way that the model will know to take just the image as the input, the masks as the target.

Setting up the entire workflow
It turns out that one way to set up a complete workflow for this problem is to first create a DataSource, and from that a DataBunch. Everything else after this is pretty much the same as before: you provide the Learner with the databunch, the model, and the loss function.
A DataSource is kind of like a Dataset (if not the same). It's meant to return a sample of the dataset when indexed into. In general, a supervised problem has one input and one target. Here, instead of taking the four masks as the target (as I did when I organized them in a dictionary in the previous section), take each of them as a target, so there are four targets. Viewed this way, when creating the DataSource, you need to tell fastai that you have 5 things but 1 of them (the first one) is the input and the remaining 4 the targets:
tfms = [[PILImage.create],
        [RLE_Decode('fish', ANNOTS, IMG_SHAPE), tensor2mask],
        [RLE_Decode('flower', ANNOTS, IMG_SHAPE), tensor2mask],
        [RLE_Decode('gravel', ANNOTS, IMG_SHAPE), tensor2mask],
        [RLE_Decode('sugar', ANNOTS, IMG_SHAPE), tensor2mask]]

dsrc = DataSource(items, tfms=tfms, splits=split_idx, n_inp=1)
To say you have 5 things for fastai to take care of, tfms needs to be a list of 5 transform pipelines, each of which is itself here represented by a list of transforms. To declare that only the first thing is to be taken as the model input, you set n_inp, the number of independent variables, to 1. The items here are the image file names, so the first transform pipeline takes this and returns a PILImage, the second pipeline take this and returns a PILMask for fish clouds, and so on. The four targets' pipelines are identical except for the name of the cloud type, but you do have list them separately like this. splits splits the items into train and valid sets.
To get the dataloaders and databunch, you call the DataSource.databunch method. Here, there are 2 further sets of data transforms that you can provide: after_item and after_batch.
after_item_tfms = [rescale, ToTensor]
after_batch_tfms = [Cuda(), IntToFloatTensor(), Normalize(*imagenet_stats)]
dbch = dsrc.databunch(after_item=after_item_tfms, after_batch=after_batch_tfms, bs=8)
This databunch can now be passed to the Learner for training and validation.
Type dispatch
From the names of the transforms you can probably guess why they are divided into these 2 sets. after_items are those transforms that cannot be applied to a batch and that happen on the CPU, like rescaling images which can be of different sizes. after_batch are the transforms that are applied to a batch and may take place on the GPU. So, some time between the application of after_items and after_batch transforms, samples are drawn from the dataset and a batch is formed.
I think the after_item transforms can actually be moved to the tfms when creating the DataSource, but it will look repetitive:
tfms = [[PILImage.create, rescale, ToTensor],
        [RLE_Decode('fish', ANNOTS, IMG_SHAPE), tensor2mask, rescale, ToTensor],
        [RLE_Decode('flower', ANNOTS, IMG_SHAPE), tensor2mask, rescale, ToTensor],
        [RLE_Decode('gravel', ANNOTS, IMG_SHAPE), tensor2mask, rescale, ToTensor],
        [RLE_Decode('sugar', ANNOTS, IMG_SHAPE), tensor2mask, rescale, ToTensor]]
And here is where it can be seen that there is something special about these transforms, which is: when only 1 transform is specified for all the 5 things, like rescale, it goes through each of these 5 things and transforms it if it's applicable and in the appropriate way. For example, because it makese sense to rescale the image and the masks, rescale will process all the 5 things. But for the image, bilinear interpolation is used, while for the masks, the nearest method is used. If today we are doing image recognition instead of segmentation, the masks will be replaced with category labels, which the rescale transform will know not to process.
As explained in the video walkthrus, in the new Fastai, almost everything will have a distinct type. If it's a category, then it will belong to a 'category' type. If it's a mask, then it will be of a 'mask' type. Fastai recognises these types and decides when and how a transform should be applied. It's refered to as type dispatch.
Visualising batches
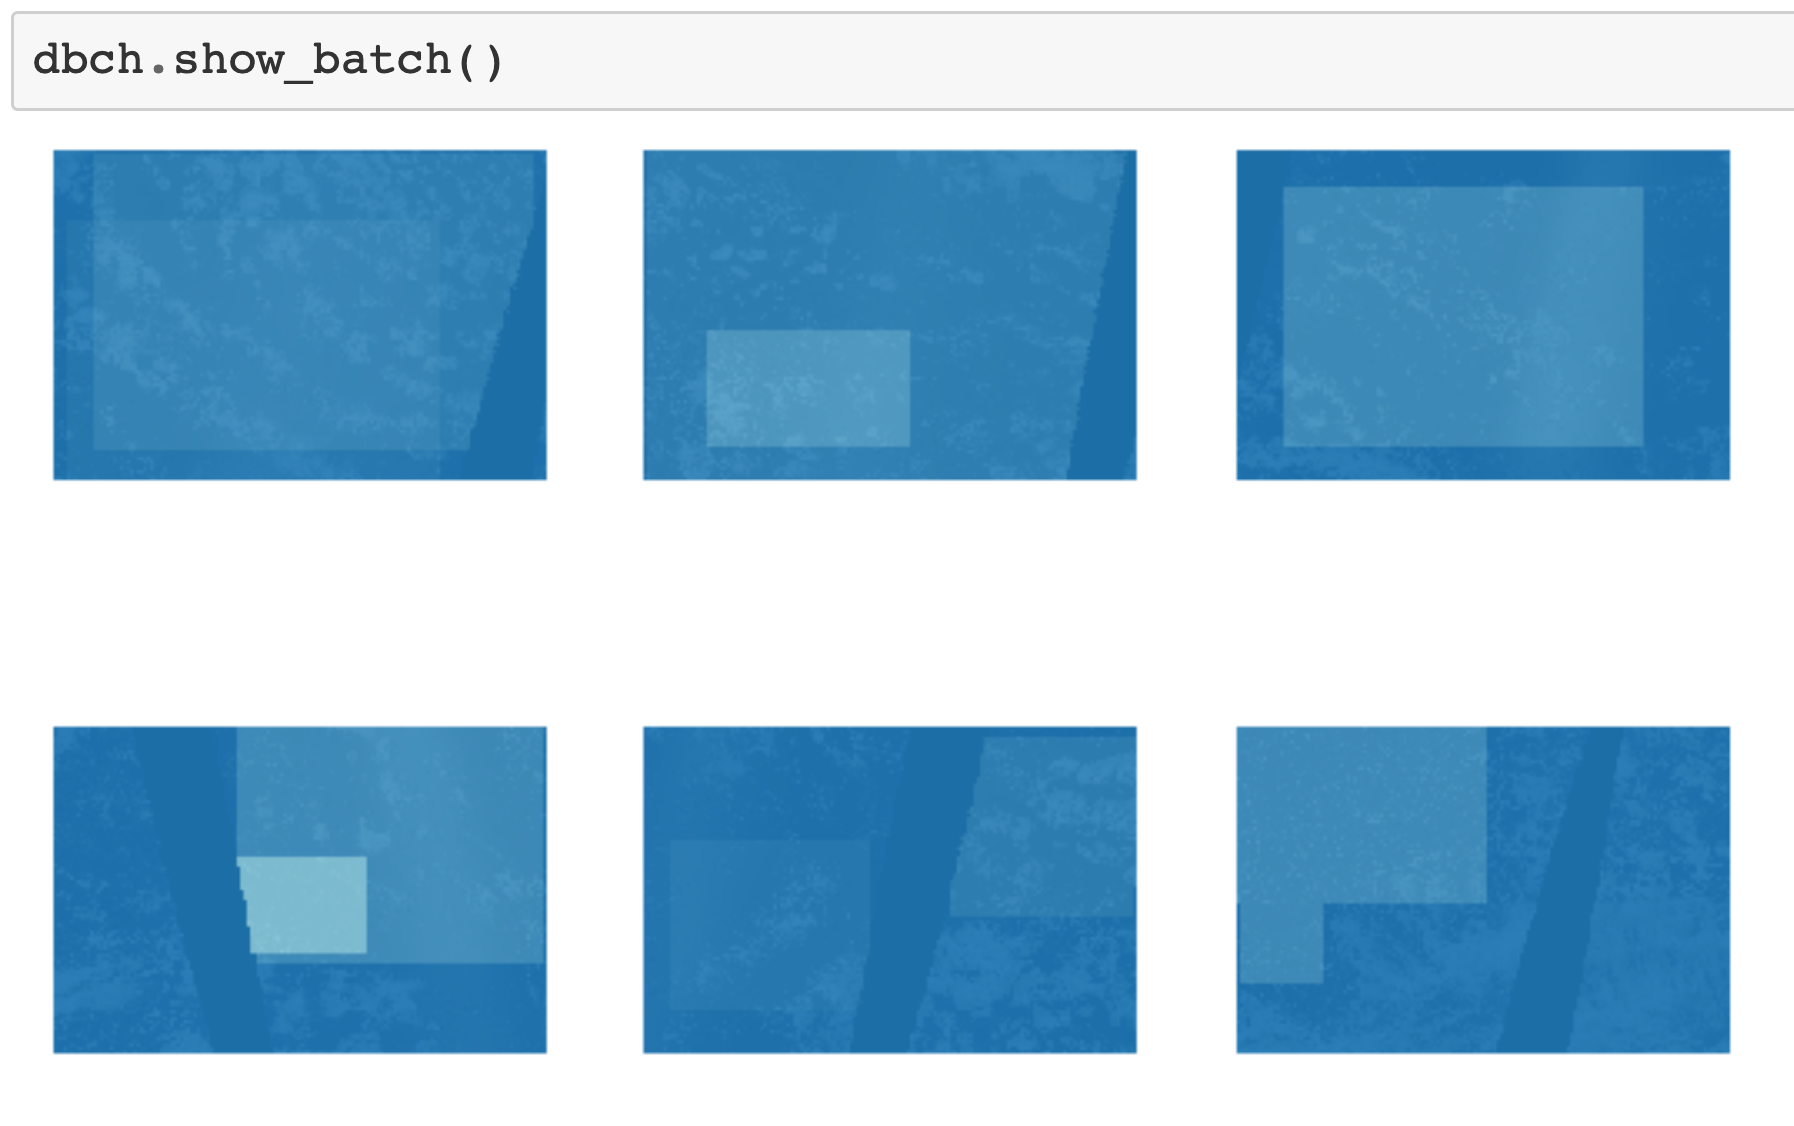
It's very easy to show a batch of the data. You can simply call the show_batch method of the DataBunch:

DataBunch.show_batch().
Fastai has combined all the 5 things together and plot them together. It knows that the masks should be overlaid on top of the image. This is already quite good! However, without digging further into the library, I'm not sure how to customize the visualisation to include the image id, the cloud types present and the colours for the different cloud types. The problem is that in the current workflow, there seem to be five separate transform pipelines, so to visualise them together, these pipelines have to be merged together at some point during the decoding process, and I don't know where that ought to happen.
PILImage and PILMask are fastai types for images and masks, respectively, that have similar behaviour to pillow objects.